in this approach, the libraries are initialized in the local scope, so if you want to use them again then you have to run the 3 lines of code again in other script sections whenever it’s used.
Second approach:
new Function triggers function in the global scope. so you just have to execute the first two lines only ones in your collection run and it will be available globally throughout:
Thanks to @webdriverio , i came to know about the chromedriver npm package. It’s a cool library that allows you to detect the installed chrome version and download the compatible chromedriver version automatically
Note: — scripts-prepend-node-path should be last argument, this flag is mandatory only if you are using node binaries than installation
if you want to download the binary to a specific folder then use the below repo instead:
I have added features to set target directory and download driver when used as a library. I have created a pull request for these but till that gets merged use the below repo instead
public static void main(String[] args) throws IOException, InterruptedException {
// just donwload the nodejs binary zip file and extract it
    //point to the npm.cmd inside the extracted folder
//if you already have nodejs installed then point to the npm.cmd of the installed library
    ProcessBuilder pb = new ProcessBuilder("C:\\Users\\test\\Downloads\\node-v14.17.0-win-x64\\npm.cmd",
      "install",
      "-g",
      "C:\\Users\\test\\Downloads\\chromedriver-main\\chromedriver-main",
      "--detect_chromedriver_version",
//  "--chromedriver-force-download",  // uncomment to force chromedriver dwonload even if it exists
      // "--chromedriver_version=88.0.4324.96", //comment detect version and hard code the version
// "--chromedriver_download_to_target_folder=\"C:\\Users\\test\\Downloads\\temp_2\\github_chromedriver\\output\"" // available only for praveendvd/chromedriver repo
      "--scripts-prepend-node-path"); //"--scripts-prepend-node-path" should be always the last argument
Process p = null;
    String result = null;
    String error = null;
pm.environment.set("res", res.text());
    // intialize the min.js
    new Function(pm.environment.get("res"))();
//create template soource
    var source =
        `{{#ifCond v1 v2}}
    {{v1}} is equal to {{v2}}
{{else}}
    {{v1}} is not equal to {{v2}}
{{/ifCond}}`;
//you can call methods in the cdn file using this keyword
    //here we are registring handlebar
Handlebars.registerHelper('ifCond', function (v1, v2, options) {
        if (v1 === v2) {
            return options.fn(this);
        }
        return options.inverse(this);
    });
//compile the template
    var template = Handlebars.compile(source);
//data to be passed
    // try v1 and v2 with same and different values and observe the output in visualization tab
    var data = {
        "v1": "test",
        "v2": "test",
    };
// passing the data to template
    var result = template(data);
//visualizing it
    pm.visualizer.set(result)
})
**Second Approach:**
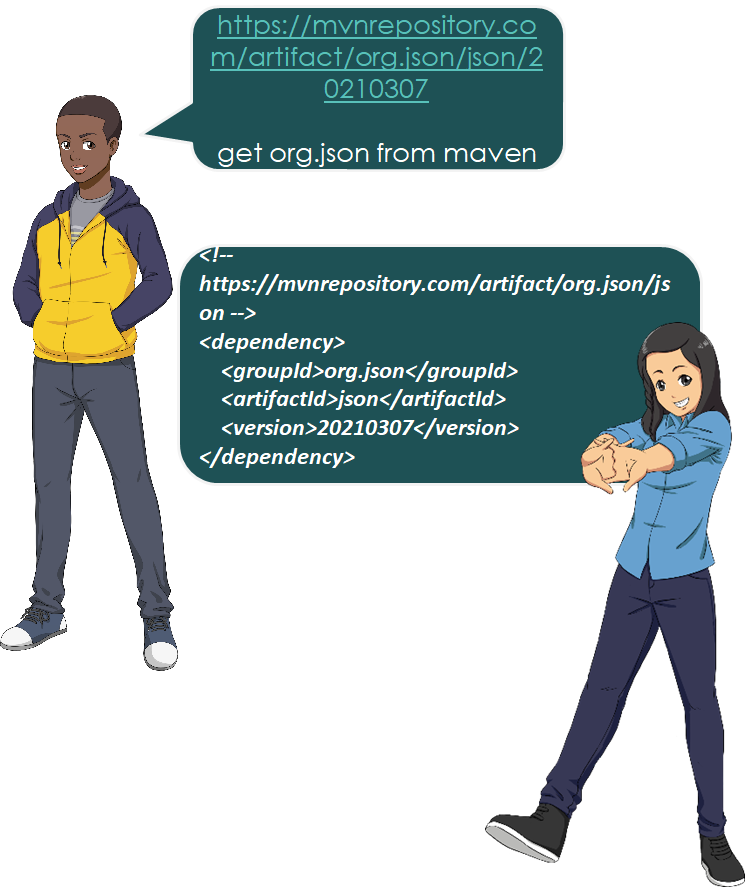
you can call any package with min build in postman
this initializes the functions in local scope so it won’t mess up the global space and cause issues
its easier than you would expect to create a project collection…
Postman API Feature:
you can create collection , mock servers, documentation in click of a button by using postman API definition feature.
Lets see how to do it!!
Get the API definition:
postman supports following API definitions:
so what is API definitions ?
API definitions, or API specifications or description formats (all are the same) defines your API . It is like a live documentation on what is available, what it can do , what is supported etc . In short a comprehensive live documentation that can help consumers understand what your API can do.
in summary:
Help internal folks understand the API and agree on its attributes
Help external folks understand the API and what it can do
Act as live documentation on what all endpoints are available, what methods are supported, what attributes are expected etc.
you can see the link to the definition file, it can be in yaml or json format. just click the link and copy the content.
you can see the version is swagger 2.0 meaning its open api v2
2. Create API in Postman
click API section and click the add icon or create new API link
Now give the below details:
name,version , open api v2.0 and json , and click create
Now paste the swagger definition we copied from pet store:
you can press ctrl+b to format the json properly after pasting:
click save
3. Now Generate collection from this swagger definition:
click generate collection:
click show advanced settings:
Give the below settings:
Now click Generate collection and goto your collections once the collection generation completes
4. Mock server , documentation and other things
so the generated collection will have documentation and examples as per the API definition file provided so you don’t have to generate documentation separately!!
And for mockserver, you can directly create a mock server from the collection as the examples are already available.
5. Publishing your documentation and adding animation to your documentation
Click the collection and click view documentation , and click publish
Now you have the documentation available in public domain for your customers.
Here we are running scripts from a remote/local Appium server while the devices are connected to another system in the network.
Setup:
Start adb server in the system in which devices are connected:
Just run the below command in cmd (given adb is available in path)
adb kill-server
adb -a -P 5037 server nodaemon
Appium capabilities:
Now to run appium tests we need to add the below capability:
Try appium inspector from the remote system with below capability (edit all other fields according to your setup except remoteAdbHost,systemport and adbPort)
here remoteadbhost is the remote system which has connected devices, system port is the uiautomator2 server port which is 8021 by default and finally adbport
This will allow you to inspect the remote devices from your local system
There is no inbuilt way to specify a specific iteration row to be executed using Newman, but can be done using Powershell or by using Newman as a library.
The approaches are as below
Powershell:
here we read the actual csv file in the current directory using import csv
Then considers only row 1..2 , if you just want 1 row you can change $a[1..2] to $[1]
This is why proper API documentation and proper status code is important 😀😀😀
Spend half an hour trying to figure out how to delete a #Jenkins #job using “Jenkins remote access API” 😩 😤 😮 😱
You can access all the methods support for an endpoint say for the below job:
https://<Jenkins_url>/job/<job_name>
at : 👇
https://<Jenkins_url>/job/<job_name>/api
The documentation at this endpoint says, to programmatically delete a job, just do DELETE to “This URL”, which on clicking takes us to: 😖 😫 😩👇
https://<Jenkins_url>/job/<job_name>/
so I tried #DELETE method on : 😑 😒 👇
https://<Jenkins_url>/job/<job_name>
And guess what we get status #200 but the job never gets deleted after playing around for half an hour by reading many answers online and inspecting the #network tab when you do delete from UI. I identified the below endpoint to do this: 📌 📍 📌 📍 🚩
https://<Jenkins_url>/job/<job_name>/doDelete
But was still wondering why the documentation was wrong !!! so gave a last try of adding the front slash as per the URL opened up in the browser: 🙏🙏
DELETE https://<Jenkins_url>/job/<job_name>/
Guess what !!!!! 💰 💰 I got a status code #204 and JOB got deleted !!!! 😂 😃 😄 😅
so note: front slash is important if you are playing with Jenkins remote access API 😂 😃 😄 😅
Now I had a tool — agiledox — to remove the word “test” and a template for each test method name. It suddenly occurred to me that people’s misunderstandings about TDD almost always came back to the word “test”.
That’s not to say that testing isn’t intrinsic to TDD — the resulting set of methods is an effective way of ensuring your code works. However, if the methods do not comprehensively describe the behaviour of your system, then they are lulling you into a false sense of security.
I started using the word “behaviour” in place of “test” in my dealings with TDD and found that not only did it seem to fit but also that a whole category of coaching questions magically dissolved. I now had answers to some of those TDD questions. What to call your test is easy — it’s a sentence describing the next behaviour in which you are interested. How much to test becomes moot — you can only describe so much behaviour in a single sentence. When a test fails, simply work through the process described above — either you introduced a bug, the behaviour moved, or the test is no longer relevant.
I found the shift from thinking in tests to thinking in behaviour so profound that I started to refer to TDD as BDD, or behaviour- driven development.
It shows that focusing on the behavior of the system than on functionality we get more clear understanding on:
What to implement
What to test
What to consider as acceptance criteria for marking a story “done”
Where to start: keep story as the starting point , it defines what functionality and what behavior the system should have. It avoids the cases of having misunderstanding about the system and ensures there is no “absence of error fallacy” (absence of error fallacy mean there is no errors but the system itself is not usable as it was not build the way it was required to be )
What changes to make and what are its effect on the system behavior
Provides more traceability and visibility of system functionality and features
More test coverage traceability as you know what all scenarios or behaviors to be covered
Behaviour-driven development uses a story as the basic unit of functionality, and therefore of delivery. The acceptance criteria are an intrinsic part of the story — in effect they define the scope of its behaviour, and give us a shared definition of “done”. They are also used as the basis for estimation when we come to do our planning.
Most importantly, the stories are the result of conversations between the project stakeholders, business analysts, testers and developers. BDD is as much about the interactions between the various people in the project as it is about the outputs of the development process.
KDT
Keyword driven testing is a way of achieving the BDD approach in testing , you can define the behavior of a system using **keyword**.
you can also do this using **Gherkin** as in cucumber
Framework like **Robotframework** supports both keyword abstraction and use of Gherkin(Given,when,then)
Summary:
BDD is a development practice where user stories are defined by defining the expected behavior of the system towards a specific action. It allows more clarity on what to develop, test and deliver.
and KDT is the approach of implementing BDD in test framework so that we get test coverage and one to one traceability with our test scripts and user stories
Gherkin is another syntactical way of defining BDD in test,
so you can use both Gherkin, Keyword driven , or simple page object method abstractions that defines behavior than functionality in your BDD test framework.
example:
As a [X] I want [Y] so that [Z]
where Y is some feature, Z is the benefit or value of the feature, and X is the person (or role) who will benefit. Its strength is that it forces you to identify the value of delivering a story when you first define it.
Another form of explaining behavior would be :
Given some initial context (the givens), When an event occurs, then ensure some outcomes.
in both forms there is an action by the actor/user and an expected behavior from the system.
Important:
Unless the keywords or Gherkin or test methods defines the behavior of the system , non of Gherkin , Keyword driven or simple test methods cannot be considered as Behavior driven, they become just Gherkin , KDT or plain low test methods.
so not all keywords or Gherkin or test methods are BDD compliant
records = pm.variables.get("records")
index = pm.variables.get("index")
//we are setting variable
if (index !== records.length) {
for (let i of Object.entries(records[index])) {
        pm.variables.set(i[0], i[1])
    }
    pm.variables.set("index", ++index)
    pm.variables.get("index")===records.length?null:postman.setNextRequest(pm.info.requestName)
}
Now you can run data driven for that one particular request:
Note that here we used pm.variables. this is because it creates local variable that get destroyed after the collection run completes .
So for each run , first value will be null and then will be set to 0